Pass Data from a UITableViewCell to another ViewController in Swift.
You might have noticed while operating on your phone, for example, in the Settings Page, you see a list of settings and when you click on any one of them, it navigates you to the other page which displays you the entire data of the setting you have clicked.
Similar functionality I have explained in this article.
Prerequisites:
- Mac OS
- XCode
Create an iOS -> Single View App Project on XCode.
On Main.storyboard file, we will create our UI. First of all lets embed the existing ViewController to a NavigationController using Editor -> Embed In -> Navigation Controller.

Design the UI as follows by dragging and dropping Label and Table View from Object Library. NOTE: (command + shift + L) in the new versions of XCode. Here I have given the title as ‘Categories’ in my UILabel.

Press Ctrl button and clicking on the table view, drag the mouse upwards towards the yellow icon above ViewController until a black box appears. You can see the yellow icon in the above image. Click on delegate and dataSource.
If you see the white dots besides dataSource and delegate, then you have connected the tableview to them.

Connect your tableview to your ViewController by opening Assistant.

Now let’s create an .xib file in which we will design a custom table view cell that we wish to display on the table view.
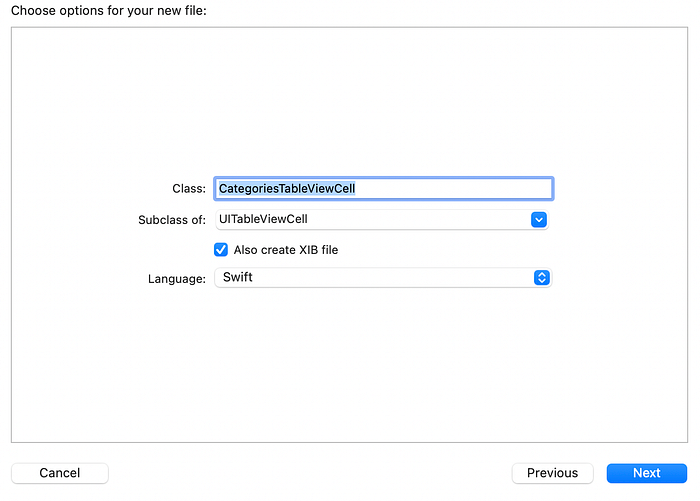
Go to File -> New -> File -> Cocoa Touch Class. Name the Class and select the subclass as UITableViewCell. Also, check the box ‘Also Create XIB file’.
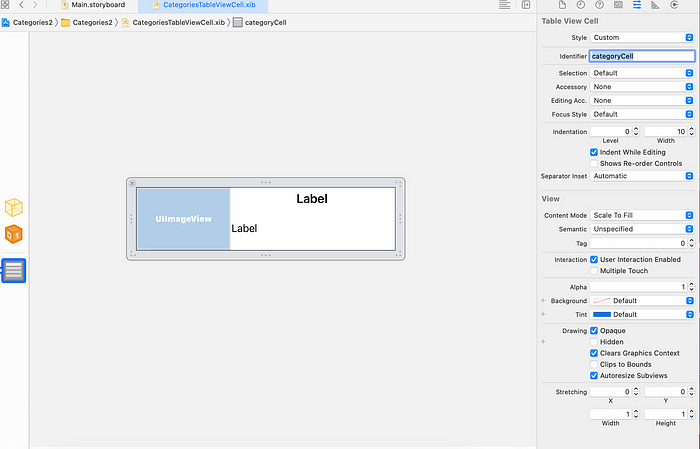
In the Size Inspector, increase the width and height of the cell. While increasing the height of the cell, make sure you uncheck the box Automatic in Row Height section and check it after you have made the changes in the height. I have set the width of the cell as 414 and height as 100.
Drag and drop ImageViewCell and Labels as shown below. Also, assign an identifier to the cell in the Attribute Inspector.
Connect the outlets in the newly created TableViewCell.swift file.
Now, we will register the created .xib file in the ViewController file. Add the following line in viewdidLoad() function in the ViewController file.
tableView.register(UINib(nibName: “CategoriesTableViewCell”, bundle: nil), forCellReuseIdentifier: “categoryCell”)
Here, nibName is the name of the xib file and forCellReuseIdentifier is the name assigned to the Identifier of tableviewcell.
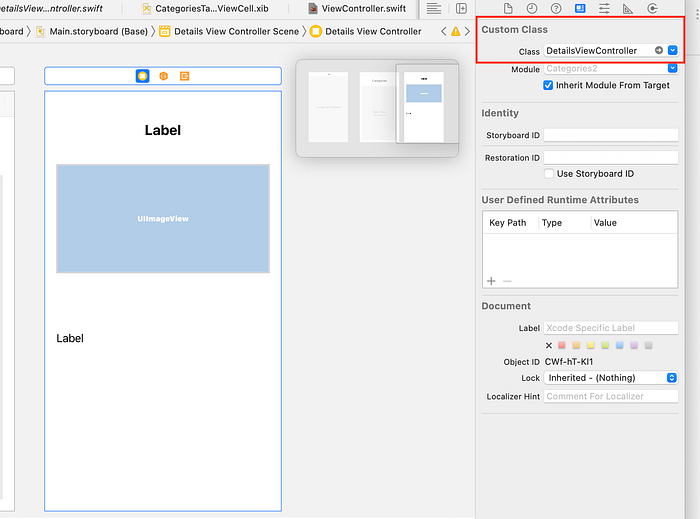
Now, let’s create another ViewController where we will pass the data of the tableview cell. Also create a new Cocoa Touch File with subclass UIViewController for this ViewController. This time, uncheck ‘Also create XIB File’ as we don’t need it. I have named this ViewController as DetailsViewController. Assign the name in the Identity Inspector as shown in the image.
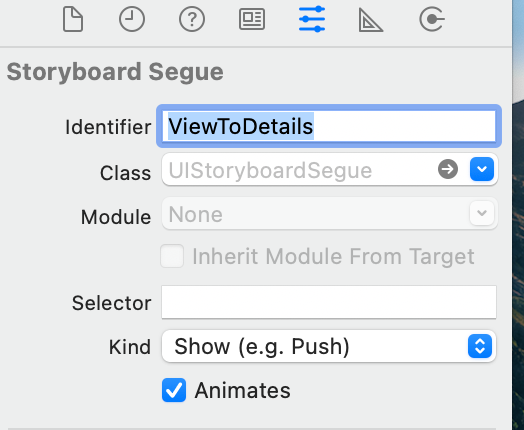
Now, we will connect both the view controllers using segue. Click on the small yellow icon present above the ViewController along with the Ctrl button and drag your mouse towards the DetailsViewController. A black box appears with many options inside it. Click on ‘Show’.
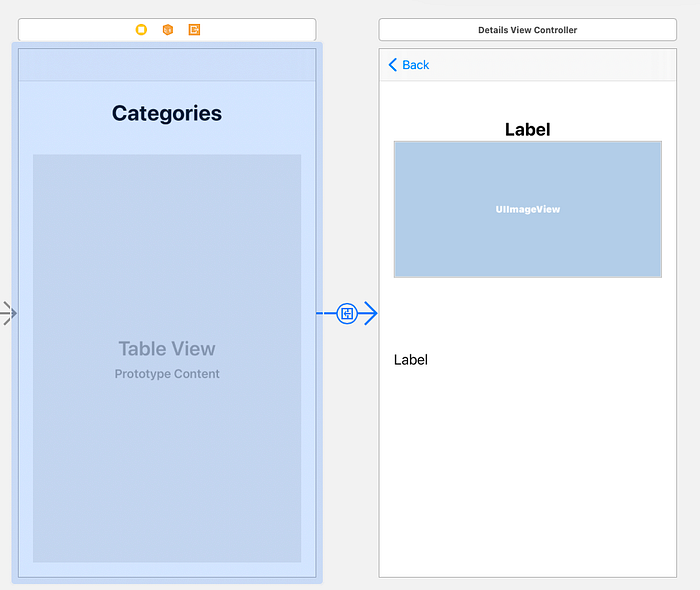
You will see an arrow icon connected between the 2 controllers. Click on the arrow icon and name the Identifier of the segue in the Attributes Inspector.
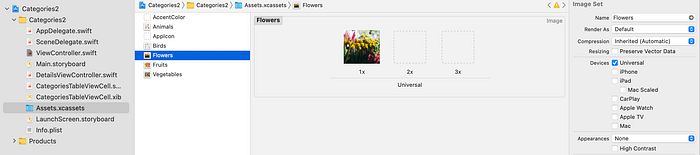
Now, let’s add some images in the Assets.xcassets folder. Right-click and click on Image Set. Name your Image Asset and add the images you want to display on your app.
Finally, refer the below code and make the changes in ViewController.swift file.
import UIKitclass ViewController: UIViewController,UITableViewDelegate,UITableViewDataSource {@IBOutlet weak var tableView: UITableView!var dictCategories: [String: String] = ["Fruits": "Apple,Mango,Grapes,Banana,Kiwi", "Vegetables": "Onion,Potato,Cabbage,Carrot,Cucumber", "Animals": "Cat,Dog,Mouse,Cow,Goat", "Birds": "Pigeon,Crow,Dove,Sparrow,Woodpecker", "Flowers": "Rose,Lilly,Lotus,Jasmine,Sunflower"]override func viewDidLoad() {super.viewDidLoad()tableView.register(UINib(nibName: "CategoriesTableViewCell", bundle: nil), forCellReuseIdentifier: "categoryCell")}func tableView(_ tableView: UITableView, numberOfRowsInSection section: Int) -> Int {dictCategories.count}func tableView(_ tableView: UITableView, cellForRowAt indexPath: IndexPath) -> UITableViewCell {let titleArray = Array(dictCategories.keys)let detailsArray = Array(dictCategories.values)let cell = tableView.dequeueReusableCell(withIdentifier: "categoryCell") as! CategoriesTableViewCellcell.lblTitle.text = titleArray[indexPath.row]cell.lblDetail.text = detailsArray[indexPath.row]//As dictionary is an unordered collection, I used switch case to display the correct image for the correct data.switch titleArray[indexPath.row] {case "Fruits":cell.imgView.image = UIImage(named: "Fruits")case "Vegetables":cell.imgView.image = UIImage(named: "Vegetables")case "Animals":cell.imgView.image = UIImage(named: "Animals")case "Birds":cell.imgView.image = UIImage(named: "Birds")case "Flowers":cell.imgView.image = UIImage(named: "Flowers")default:cell.imgView.image = nil}return cell}func tableView(_ tableView: UITableView, didSelectRowAt indexPath: IndexPath) {self.performSegue(withIdentifier: "ViewToDetails", sender: self)}override func prepare(for segue: UIStoryboardSegue, sender: Any?) {let detailsVC = segue.destination as! DetailsViewControllerlet selectedRow = tableView.indexPathForSelectedRow!.rowdetailsVC.ctgyTitle = Array(dictCategories.keys)[selectedRow]detailsVC.details = Array(dictCategories.values)[selectedRow]detailsVC.image = UIImage(named: Array(dictCategories.keys)[selectedRow])}}
Explanation: In the above code, I have created a Dictionary dictCategories which consists of data I want to display on my app. In cellForRowAt tableview function, I have created 2 arrays, one which consists of dictionary keys data and the other consists of dictionary values data. Also, I have used the switch case to display the proper image with the proper data.
The didSelectRowAt tableview function contains the identifier of the segue which is responsible for the navigation between the 2 view controllers.
override func prepare() contains the code to display the data of the clicked tableview cell on DetailsViewController.
Below are the code of CategoriesTableViewCell.swift and DetailsViewContoller.swift files for your reference.
NOTE: I have added some code in the DetailsViewController.swift file.
CategoriesTableViewCell:
import UIKitclass CategoriesTableViewCell: UITableViewCell {@IBOutlet weak var lblDetail: UILabel!@IBOutlet weak var lblTitle: UILabel!@IBOutlet weak var imgView: UIImageView!override func awakeFromNib() {super.awakeFromNib()// Initialization code}override func setSelected(_ selected: Bool, animated: Bool) {super.setSelected(selected, animated: animated)// Configure the view for the selected state}}
DetailsViewController:
import UIKitclass DetailsViewController: UIViewController {@IBOutlet weak var lblctgy: UILabel!@IBOutlet weak var imgView: UIImageView!@IBOutlet weak var lblTitle: UILabel!var ctgyTitle: String!var details: String!var image: UIImage!override func viewDidLoad() {super.viewDidLoad()lblTitle.text = ctgyTitlelblctgy.text = detailsimgView.image = image}}
Run the Project and If all goes well, then you must get the output as shown below:
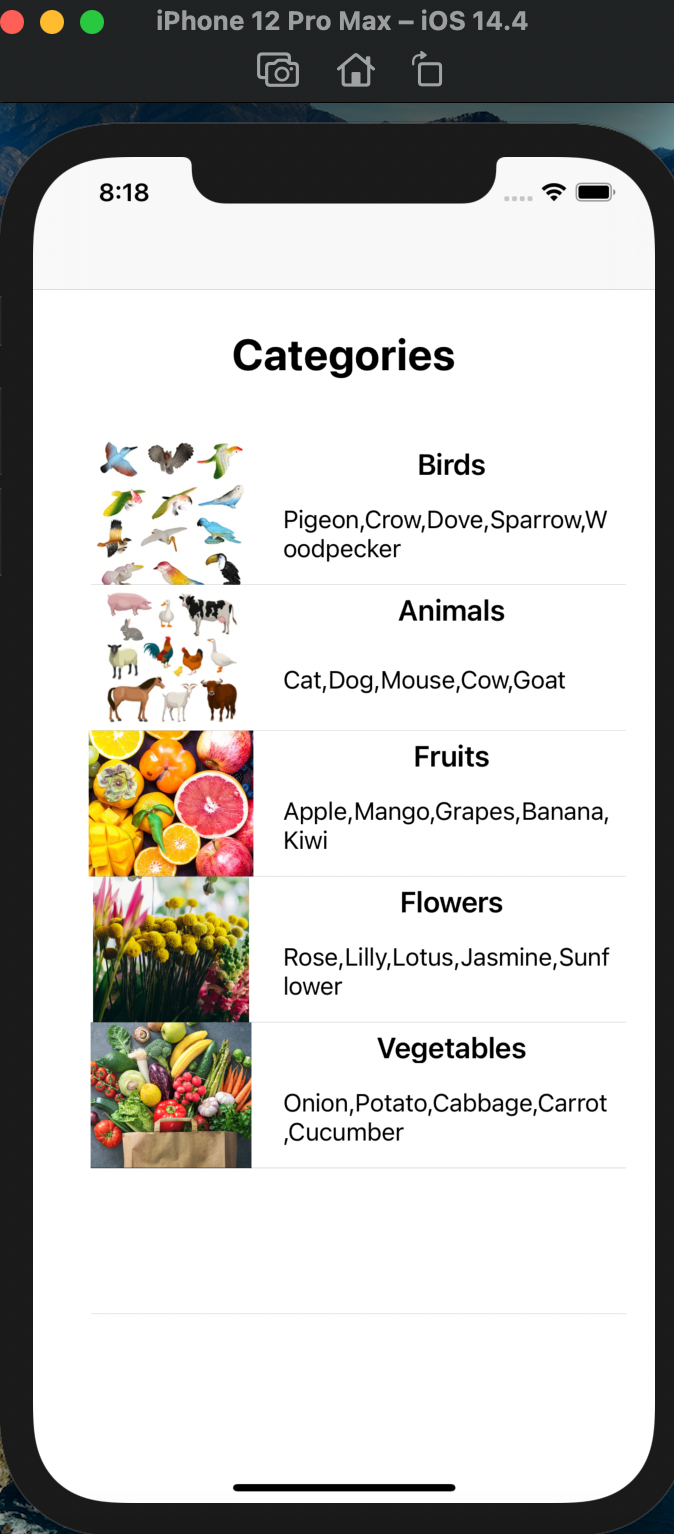
Click on any cell and it will navigate you to the next page.
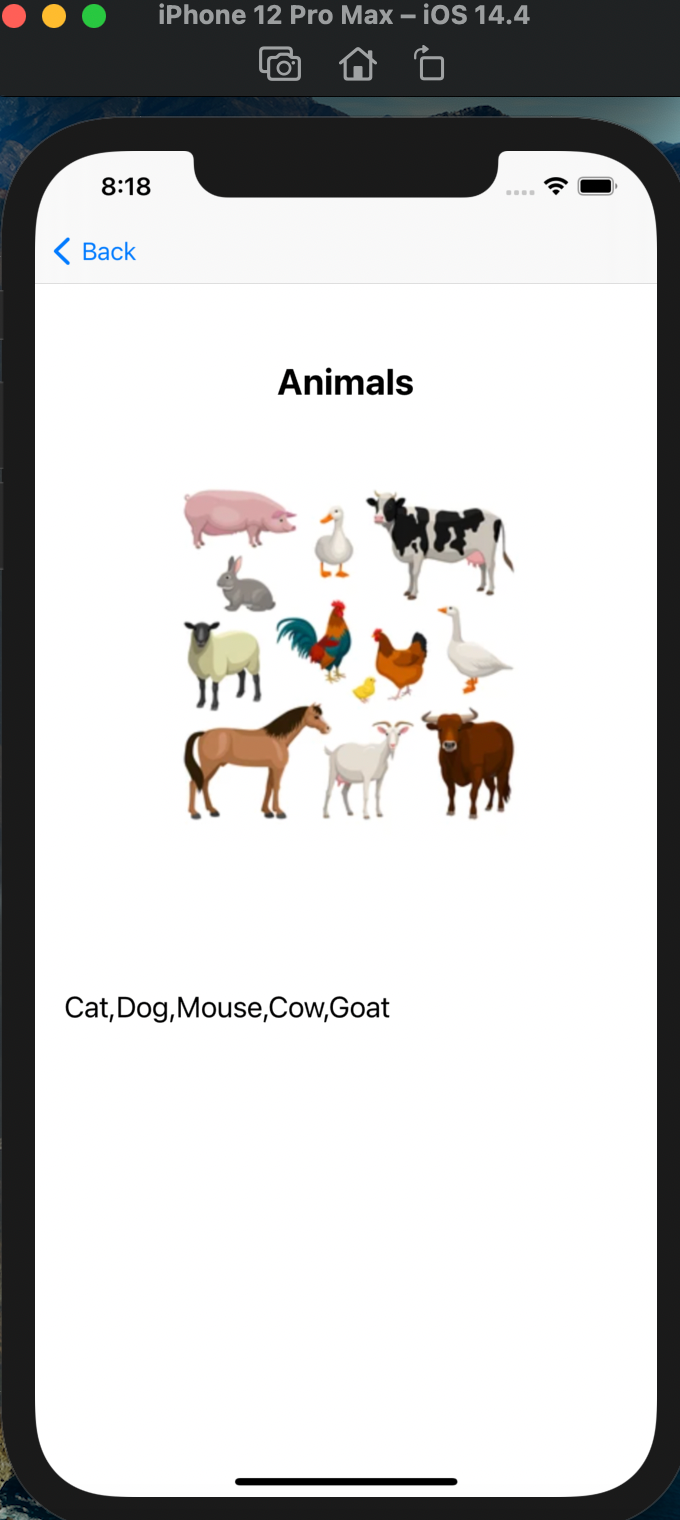
Finally, we have created an app which performs navigation from a UITableViewCell to another ViewController.
Happy Coding!