Show Locations On Map Using MapKit and CoreLocation
4 min readJul 24, 2023
In this article, we will learn how to use MapKit and CoreLocation in Swift and create a simple demo to display some of the well-known locations on the map. We will use MapKit to display a map inside our App and CoreLocation framework to get the geographic location data.
Pre-requisites
- XCode
- MacOS
Implementation
- Create a new project in XCode. Select iOS -> App -> Name your Project -> Save It to your desired location.
- We will start implementing our demo app by adding the permissions for our App to access the locations. Go to Info.plist file -> Right-click anywhere inside Info.plist File -> Select ‘Add Row’ -> In place of ‘Bundle Identifier’, paste ‘NSLocationAlwaysAndWhenInUseUsageDescription’. Keep the Type as ‘String’ and enter ‘Value’ as ‘This App wants to access your location.’ or whatever message you would like to display on your App. Repeat the same step 2 more times and paste ‘NSLocationAlwaysUsageDescription’ and ‘NSLocationWhenInUseUsageDescription’ in place of ‘Bundle Identifier’.
- After following the above step, your Info.plist should look in this manner.

- By adding the following permissions in the Info.plist File, your App will ask for permission to enable the location of your device.
- Next, let’s go to our storyboard ‘Main’. I have created a simple tableview with a list of some of the tourist attractions of India. So our aim should be to click on any of the cells; our App must display the location on the map.
- Lets, begin by creating a tableview. I have embedded my ViewController into NavigationController. To do this, select the View Controller -> Click on ‘Editor’ -> ‘Embed In’ -> ‘Navigation Controller’.
- So now you’ll see that the View Controller is embedded into Navigation Controller.
- Next, add a TableView to your ViewController and increase the count of Prototype Cells to 1 in the Attributes Inspector. Also, select the Table View Cell and name its identifier as ‘cell’ or whatever you would like to name it. Also, add the outlet of tableView to your ViewController.swift File.
- Also, do not forget to add the dataSource and delegate of the table view. (Select the Table View -> Press ‘Control’ and drag the cursor to the little yellow button on top of View Controller -> Release the Cursor -> Select dataSource and delegate.)

- Once the above steps are done, we will go to our ViewController.swift File.
- Paste the below code in ViewController.swift File.
By adding the above code, you must be able to see the list of the locations once you run the App on the simulator.

- Moving forward, now we will add a new ViewController on our Main.storyboard. This ViewController will be responsible for displaying the selected location on the map.
- Go to Main.storyboard and add a new View Controller. In this new View Controller, add a Map Kit View. Add the delegate of this Map Kit View (Follow the same step as explained for the table view).
- Now let’s create a new Cocoa Touch File for this new View Controller.
- Go to File -> New -> File -> iOS -> Cocoa Touch Class -> Next -> Name the Class as ‘MapKitViewControllet’ -> Select ‘Subclass of:’ as ‘UIViewController’ -> Next -> Create.
- Now let’s assign this newly created MapKitViewController to our new view controller.
- Go to Main.storyboard file. Select the new View Controller. Go to ‘Identity Inspector’. Assign the class as ‘MapKitViewController’ as shown in the below image.
- Also, add a Storyboard ID as shown in the below image.

- Now you can add an outlet of Map Kit View in the MapKitViewController.
- Go to MapKitViewController and paste the following code.
- In the above code, you can see we have used ‘CLLocationManagerDelegate’ and ‘MKMapViewDelegate’, which are the delegates of CoreLocation and MapKit, respectively.
- Also, in the ViewController.swift File, add the following tableView code.
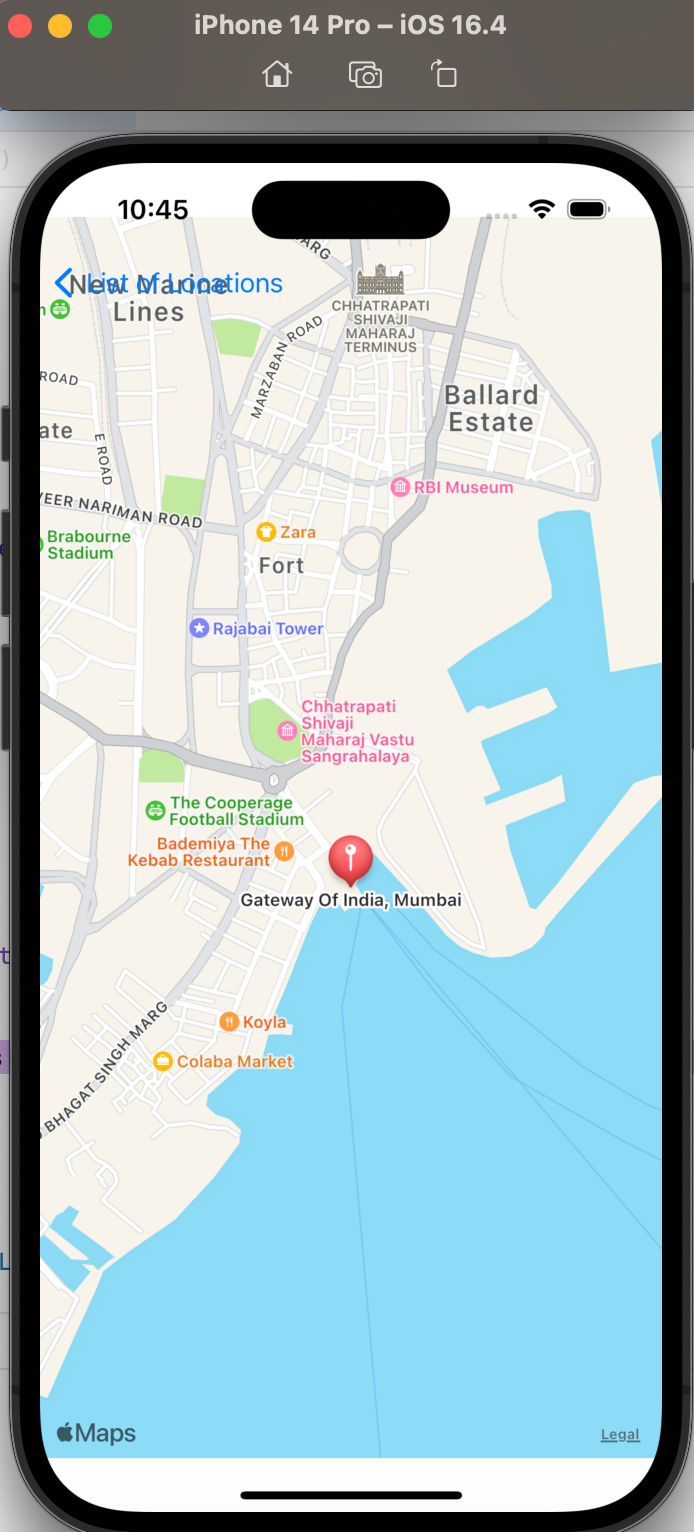
- This is a simple Demo App that I have created with the moto of self-learning. Any suggestions/feedback are happily accepted. Happy Coding!